I hesitated to call this list "Essentials", because what is essential to one person may not be for someone else. In fact, I found that some of my favorite things when Brooklyn was a baby have been all but ignored this time around. Different babies = different needs. For example when Brook was a baby, I loved the sleepers that had the little fold-over sleeves because she was forever scratching herself with her long fingernails. Emma hasn't even needed a single clipping of her nails yet, and has never scratched herself so I've only folded her hands into the little sleeves a few times, usually at night when her hands get cold because she hates having them swaddled.
So consider this a roundup of my favorite items for the newborn stage - you decide for yourself which ones are essential or not!
1. Receiving blankets/burp cloths.
 |
| crumbsinmypurse.blogspot.com |
When I was pregnant with Brooklyn, my mom sewed us about a dozen huge receiving blankets, and she made us another set when Emma was born! On any given day, you will find these strewn all about the house; we use them for E.V.E.R.Y.T.H.I.N.G.
- To tuck under her chin when she eats; she's a messy eater and gets milk all over her clothes otherwise
- To lay over my shoulder when I burp her, or when she's sick and her nose is running. Keeps my clothes clean :)
- We have a receiving blanket rolled up inside her carseat. The infant head support is still too large for her, so this helps fill in the gap and makes sure she fits nice and snug inside.
- We also use a second receiving blanket to tuck her into her carseat. She tends to be quite warm, and using a heavy blanket means that she just gets overheated and fussy.
- When Brooklyn was a baby, her lamp was too bright and we used to drape a receiving blanket over the shade for middle of the night diaper changes. Not sure I'd recommend that, as it could be a fire hazard but in our sleep deprivation it seemed to do the trick.
- I also lay one down on her change pad if I expect that it's going to be a particularly messy diaper change. We have two removable change pad covers that are washable, but it seems like in those first few weeks we were spending more time changing and washing those covers and they were rarely ever on the change pad for diaper changes because they were always in the wash. A receiving blanket is easy to lay down first and much easier in my opinion to toss in the wash. Keeps my fancy covers clean and looking cute :)
- Who needs expensive swaddle blankets? Ask the nurse at the hospital to give you a quick tutorial on how to get a tight wrap, and a receiving blanket works quite nicely.
- The large receiving blankets make perfect nursing covers!
I could go on all day, but let's just say we find them very useful and I would recommend having a lot of them, especially the really large ones.
2. Cloth wipes.
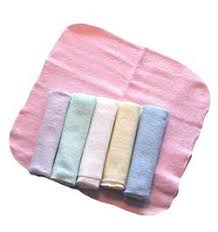 |
| Source: lebabyshop.com |
Even if you choose not to use cloth diapers, having a few cloth wipes on hand is a really good idea. If baby gets a diaper rash, a soft damp cloth is so much gentler on their sore bottom than a chemical filled, scented cold disposable wipe.
I have also learned that they get the job done so much faster. One cloth wipe
( I just use baby washcloths, but any soft material cut into squares will work) can do the job of 3 or 4 disposable wipes. They really do clean up messes much faster and easier!
3. Fisher Price Cradle N Swing
We have most of the typical baby gear . . . a vibrating bouncy chair, a jolly jumper, a bumbo chair, a playmat. But the place where both my girls have spent the most time is definitely this swing. In fact, the first two weeks Emma slept in her swing all night long. She seemed to need to be snuggled, and if she wasn't in our arms she would just cry. Laying her down, even swaddled, in a flat bassinet or crib just wasn't cutting it for her. Our swing is contoured on the sides and has an infant head support, so she feels like she is being held when she lays in it. Those first weeks when she was so teeny and new, the swing seemed to be the only place she felt safe. Everywhere else she would throw up her little arms in alarm as if she felt like she were falling.
I love this swing specifically because it plugs in. Swings that only run on batteries can cost a lot of money if you are constantly needing to buy replacements, as most of them use 4 D batteries at one time! We love that we don't have to keep purchasing batteries, but we have the option to use batteries if we need to (it's great when the power goes out!) I also love that it has the option to swing in two different directions and it comes with tons of options for sound effects and music.
4. A sling or wrap.
I have a
Peanut Shell classic sling and I highly recommend it simply because it's easy. No tying and wrapping, no adjusting of any straps or anything. Just fold it in half, slip it on and baby goes right inside. Easy peasy.
When you have a new baby you will find yourself saying things like "I can never get
anything done around here" and "I didn't get
anything done today".
Well, this sling is how you get "
anything done".
Even at her fussiest, I can pop Emma in here and she calms right down. I also really like that I can get in my snuggle time and watch her WHILE I get things done; sometimes I feel guilty if she lays in her swing for too long because she's all alone. The sling lets me have my hands free but we are still getting in some good bonding time as well. Win win!
5.Gumdrops pacifiers
Brooklyn wasn't too picky with her pacifiers; we had several different styles and she took anything. Emma was much more particular. We had bought a package of these and she used them a few times during her first few weeks. I bought another package of Gerber pacifiers that had a contoured nipple and she would choke and gag whenever we offered her one. I tried a Nuk, and she had the same reaction. Instant gagging and choking. Back to the rounded Gumdrop pacifier, and she latched on happily. They are the clear winner for this little girl!
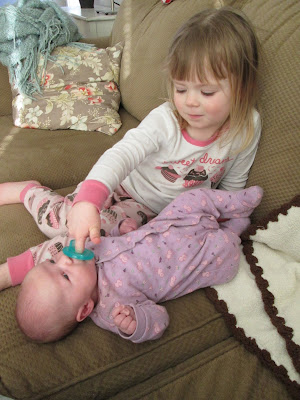 |
| crumbsinmypurse.blogspot.com |
6. Live Clean Baby products
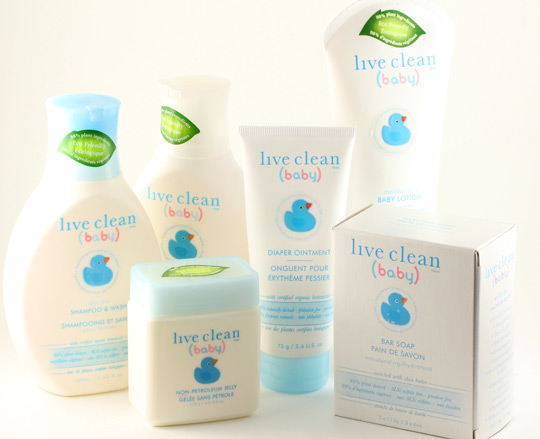 |
Source: makeupandbeautyblog.com
|
I've tried it all, from Burt's Bees to fancy organic lines to Aveeno to Johnson's. And this stuff beats them all hands down. It's super gentle, smells great - SO MANY baby products smell like great grandma's perfume, why is that? and is natural. Best of all, it's very inexpensive - I get mine at Walmart and it's reguarly on sale too!
7. A good stroller
When Brook was born, we were given a hand me down travel system. It was fine, honestly, but I really wanted a stroller with big tires. Our little town has a lot of rough curbs and big pot holes and I also did a lot of walking on gravel and muddy roads and the travel system really struggled. It was also gosh darn ugly to boot. When a neighborhood cat decided to start peeing on it, that was the end for me. I could not get the cat pee smell out, so we bought a used sit and stand stroller. I loved it, but again it had tiny wheels and was so long that it was really awkward to steer, especially in the mall or a store.
I also had a double jogger stroller that was given to me 3rd or 4th hand. Last summer I finally just sold all three strollers, and bought a used
Phil and Teds E3 with a doubles kit. It was almost $400 used, which seemed so silly to me for a stroller. But honestly, it was worth it. Every time I use it, I say "Thank GOD we finally have a good stroller." What a difference in how it pushes and steers!
I've talked to several other moms who have had similar experiences. They wasted hundreds of dollars buying different strollers trying to save money but never finding a good one. Then finally they bite the bullet and splurged on a high end stroller. In the long run, it would have been cheaper to just buy a high end stroller to begin with!
I highly recommend splurging on a good stroller, whether it is Phil and Ted's or not. I am a huge fan of buying used and making do with what you have, and with all the other baby gear (play pen, high chair, jolly jumper, toys, and clothes) aside from carseats. I still say that you get the most bang for your buck by purchasing gently used. But don't waste your breath on that $80 bargain stroller from Walmart - find a high end stroller on Craigslist or Kijiji and get it! You won't regret it, and you can re-sell it down the road for a good portion of what you paid for it.