


Showing posts with label Tips. Show all posts
Showing posts with label Tips. Show all posts
Thursday, May 9, 2013
Things Motherhood Has Taught Me #1
That my kitchen sink will overflow almost exactly 20 minutes after I walk away from running the dishwater.
Apparently I should not just "Run up and grab the baby because she's crying" without turning off the water first. Thank goodness my sink was designed to overflow into the second basin first before sloshing onto the floor because after I grabbed the baby, I also changed a diaper and sat down to watch the last 15 minutes of Land Before Time with Brook . . . I didn't remember that I had started running the dishwater until I was walking down the hallway and heard the sound of water dripping.
Actually, I didn't remember then either. I had no idea where the sound was coming from and I checked the garage first; it wasn't until I walked into the kitchen and saw the bubbles floating over the edge of the counter and down my cabinets that I remembered.
Now I know.
Tuesday, April 16, 2013
Chalkboard Paint Tips
Chalkboards are a big thing in the DIY world lately, largely due to Pinterest and the fact that most paint brands now carry cans of chalkboard paint; some brands like Benjamin Moore are even tinting them every colour in their paint line!
I've made a lot of chalkboards, and a few friends have asked me why their homemade chalkboards didn't turn out like mine, or why the writing doesn't seem to erase fully. They blame it on being a homemade chalkboard but really it's just that they didn't know a few tips and tricks of working with chalkboard paint. If done correctly, a homemade chalkboard looks and works just as well as one from a store!

Here are my top tips for DIY'ing with chalkboard paint.
1. Stir carefully.
Chalkboard paint can "break" just like a delicate sauce you cook on the stovetop. There is no need for vigirous shaking or stirring, just gently stir with a paint stir stick until it looks smooth.
2. Prep your surface.
If your surface is not smooth, your chalkboard won't be either. If you are painting a chalkboard wall I recommend you give it a light sanding and wipe with a damp cloth before painting. If you are wanting to create a chalkboard, choose a surface that is perfectly smooth. I like to use thin sheets of hardboard that are finished on one side, but I have also painted on glass (perfect for making chalkboard frames because you can just paint the glass insert in a photo frame).
3. Just like regular paint, it's better to do several thin coats than one thick, gloppy coat.
I find using a dense foam roller is the best way to avoid visible lines and get the smoothest finish. Chalkboard paint is thicker than most paint, so it's very easy to over apply it. I like to do 3-4 very thin coats for a nice smooth finish, making long straight strokes with the foam roller rather than just rolling it on all willy nilly or in the "W" shape that is recommended when using regular paint.
3. Resist the urge to try it out right away.
Give your new chalkboard at least 2 days to fully cure before whipping out the chalk
4. Season your surface
The first thing you should do when your chalkboard is ready to use, is to rub a piece of chalk all over the surface. Wipe it off with a dry cloth, and you are left with a slightly dirty looking chalkboard. NOW it's ready to decorate! If you draw or write on a freshly painted chalkboard surface without seasoning it first, you will always see what you first created no matter how many times you erase it. Chalkboard paint is dimpled and textured like the pores on your face. Filling them all in evenly with chalk dust ensures that your surface will always look even and future creations will wipe off easily.

Monday, April 8, 2013
Baby Essentials
I hesitated to call this list "Essentials", because what is essential to one person may not be for someone else. In fact, I found that some of my favorite things when Brooklyn was a baby have been all but ignored this time around. Different babies = different needs. For example when Brook was a baby, I loved the sleepers that had the little fold-over sleeves because she was forever scratching herself with her long fingernails. Emma hasn't even needed a single clipping of her nails yet, and has never scratched herself so I've only folded her hands into the little sleeves a few times, usually at night when her hands get cold because she hates having them swaddled.
So consider this a roundup of my favorite items for the newborn stage - you decide for yourself which ones are essential or not!
1. Receiving blankets/burp cloths.
 |
| crumbsinmypurse.blogspot.com |
When I was pregnant with Brooklyn, my mom sewed us about a dozen huge receiving blankets, and she made us another set when Emma was born! On any given day, you will find these strewn all about the house; we use them for E.V.E.R.Y.T.H.I.N.G.
- To tuck under her chin when she eats; she's a messy eater and gets milk all over her clothes otherwise
- To lay over my shoulder when I burp her, or when she's sick and her nose is running. Keeps my clothes clean :)
- We have a receiving blanket rolled up inside her carseat. The infant head support is still too large for her, so this helps fill in the gap and makes sure she fits nice and snug inside.
- We also use a second receiving blanket to tuck her into her carseat. She tends to be quite warm, and using a heavy blanket means that she just gets overheated and fussy.
- When Brooklyn was a baby, her lamp was too bright and we used to drape a receiving blanket over the shade for middle of the night diaper changes. Not sure I'd recommend that, as it could be a fire hazard but in our sleep deprivation it seemed to do the trick.
- I also lay one down on her change pad if I expect that it's going to be a particularly messy diaper change. We have two removable change pad covers that are washable, but it seems like in those first few weeks we were spending more time changing and washing those covers and they were rarely ever on the change pad for diaper changes because they were always in the wash. A receiving blanket is easy to lay down first and much easier in my opinion to toss in the wash. Keeps my fancy covers clean and looking cute :)
- Who needs expensive swaddle blankets? Ask the nurse at the hospital to give you a quick tutorial on how to get a tight wrap, and a receiving blanket works quite nicely.
- The large receiving blankets make perfect nursing covers!
I could go on all day, but let's just say we find them very useful and I would recommend having a lot of them, especially the really large ones.
2. Cloth wipes.
| Source: lebabyshop.com |
Even if you choose not to use cloth diapers, having a few cloth wipes on hand is a really good idea. If baby gets a diaper rash, a soft damp cloth is so much gentler on their sore bottom than a chemical filled, scented cold disposable wipe.
I have also learned that they get the job done so much faster. One cloth wipe ( I just use baby washcloths, but any soft material cut into squares will work) can do the job of 3 or 4 disposable wipes. They really do clean up messes much faster and easier!
3. Fisher Price Cradle N Swing

We have most of the typical baby gear . . . a vibrating bouncy chair, a jolly jumper, a bumbo chair, a playmat. But the place where both my girls have spent the most time is definitely this swing. In fact, the first two weeks Emma slept in her swing all night long. She seemed to need to be snuggled, and if she wasn't in our arms she would just cry. Laying her down, even swaddled, in a flat bassinet or crib just wasn't cutting it for her. Our swing is contoured on the sides and has an infant head support, so she feels like she is being held when she lays in it. Those first weeks when she was so teeny and new, the swing seemed to be the only place she felt safe. Everywhere else she would throw up her little arms in alarm as if she felt like she were falling.
I love this swing specifically because it plugs in. Swings that only run on batteries can cost a lot of money if you are constantly needing to buy replacements, as most of them use 4 D batteries at one time! We love that we don't have to keep purchasing batteries, but we have the option to use batteries if we need to (it's great when the power goes out!) I also love that it has the option to swing in two different directions and it comes with tons of options for sound effects and music.
4. A sling or wrap.

I have a Peanut Shell classic sling and I highly recommend it simply because it's easy. No tying and wrapping, no adjusting of any straps or anything. Just fold it in half, slip it on and baby goes right inside. Easy peasy.
When you have a new baby you will find yourself saying things like "I can never get anything done around here" and "I didn't get anything done today".
Well, this sling is how you get "anything done".
Even at her fussiest, I can pop Emma in here and she calms right down. I also really like that I can get in my snuggle time and watch her WHILE I get things done; sometimes I feel guilty if she lays in her swing for too long because she's all alone. The sling lets me have my hands free but we are still getting in some good bonding time as well. Win win!
5.Gumdrops pacifiers
 |
| Source :doubledutymommy19.blogspot.com |
Brooklyn wasn't too picky with her pacifiers; we had several different styles and she took anything. Emma was much more particular. We had bought a package of these and she used them a few times during her first few weeks. I bought another package of Gerber pacifiers that had a contoured nipple and she would choke and gag whenever we offered her one. I tried a Nuk, and she had the same reaction. Instant gagging and choking. Back to the rounded Gumdrop pacifier, and she latched on happily. They are the clear winner for this little girl!
 |
| crumbsinmypurse.blogspot.com |
6. Live Clean Baby products
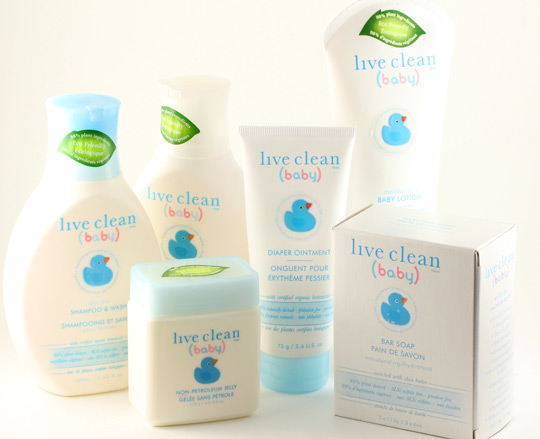 |
| Source: makeupandbeautyblog.com |
I've tried it all, from Burt's Bees to fancy organic lines to Aveeno to Johnson's. And this stuff beats them all hands down. It's super gentle, smells great - SO MANY baby products smell like great grandma's perfume, why is that? and is natural. Best of all, it's very inexpensive - I get mine at Walmart and it's reguarly on sale too!
7. A good stroller

When Brook was born, we were given a hand me down travel system. It was fine, honestly, but I really wanted a stroller with big tires. Our little town has a lot of rough curbs and big pot holes and I also did a lot of walking on gravel and muddy roads and the travel system really struggled. It was also gosh darn ugly to boot. When a neighborhood cat decided to start peeing on it, that was the end for me. I could not get the cat pee smell out, so we bought a used sit and stand stroller. I loved it, but again it had tiny wheels and was so long that it was really awkward to steer, especially in the mall or a store.
I also had a double jogger stroller that was given to me 3rd or 4th hand. Last summer I finally just sold all three strollers, and bought a used Phil and Teds E3 with a doubles kit. It was almost $400 used, which seemed so silly to me for a stroller. But honestly, it was worth it. Every time I use it, I say "Thank GOD we finally have a good stroller." What a difference in how it pushes and steers!
I've talked to several other moms who have had similar experiences. They wasted hundreds of dollars buying different strollers trying to save money but never finding a good one. Then finally they bite the bullet and splurged on a high end stroller. In the long run, it would have been cheaper to just buy a high end stroller to begin with!
I highly recommend splurging on a good stroller, whether it is Phil and Ted's or not. I am a huge fan of buying used and making do with what you have, and with all the other baby gear (play pen, high chair, jolly jumper, toys, and clothes) aside from carseats. I still say that you get the most bang for your buck by purchasing gently used. But don't waste your breath on that $80 bargain stroller from Walmart - find a high end stroller on Craigslist or Kijiji and get it! You won't regret it, and you can re-sell it down the road for a good portion of what you paid for it.
Thursday, March 7, 2013
Organizing Baby Things, Part 1
Babies come with a lot of stuff.
And they grow so fast - meaning almost as soon as you've organized one size of clothing, diapers, shoes, and hats suddenly overnight they have outgrown it and you are packing those things away and bringing out larger ones. It's a constant cycle.
And it's not only clothes! Babies go from swings and bouncy chairs to jolly jumpers and walkers. A highchair to a booster chair. Bottles to sippy cups, milk to solids . . . their first years seem to be a constant rotation of supplies and gear to meet their ever changing needs.
I thought I would do a series of posts sharing how I organize and store all of our baby things, and give you all of the little tips and tricks I have learned along the way!
Our first stop is Emma's dresser.

We opted for a long dresser instead of a changing table. I am still so grateful that we made that decision when buying our furniture during my first pregnancy four years ago: it has served us so well! A changing table is so limited in its use - before you know it, your toddler has become potty trained and suddenly your changing table has become a useless piece of expensive furniture and you now need to find a new place to store all of the things you had once stashed on its shelves.
Not so with a dresser. This piece can grow with Emma for the rest of her years growing up, or it can be repurposed somewhere else in our home down the line. It would make a great tv stand in our family room, or a buffet style server in the dining room. It could even function in the entryway as a place to store hats and scarves and drop our keys.
We topped the dresser with an inexpensive changing pad, and all of our diaper changing supplies are kept in the top left drawer so we can easily access everything we need without having a lot of clutter all over the top.
 |
| crumbsinmypurse.blogspot.com |
This drawer holds all of her diapers ( we use disposables until she can fit into our cloth diapers, more on that later) and anything else she might need during a diaper change or getting ready for the day. I keep Vaseline, a pair of baby nail scissors, baby lotions and diaper cream along with a pack of Scentsy Newborn Nursery wax that I use in her Scentsy warmer - it smells just like baby powder! There is also a stack of baby wash cloths that I get wet and use in place of disposable baby wipes. Much softer on her sensitive little tushie and cheap too!
 |
| crumbsinmypurse.blogspot.com |
 |
| crumbsinmypurse.blogspot.com |
Below her diapers I store all of her clothes, which right now consists of about a dozen newborn size sleepers and two teeny tiny newborn dresses that she wears to church on Sundays. I cannot wait until she grows big enough for pants!!!
 |
| crumbsinmypurse.blogspot.com |
Underneath her clothes are the receiving blankets. A whole drawer full of receiving blankets? Yes ma'am! These puppies are essential to me, especially during the first few months. I use them to swaddle her when she sleeps, to tuck around her in the carseat when we go out and a heavy blanket would be too warm, to drape over the carseat to keep the sun out, to lay down on the change pad to protect my white covers when I know she's had a big blowout. They make the perfect nursing covers too!
 |
| crumbsinmypurse.blogspot.com |
On the right side, I keep our cloth diapers. Emma is still so small that these diapers go up to her armpits, so we are using disposables until she grows a little more. I have a mix of Fuzzibunz and Bumgenius and I cannot say enough about how much we love our cloth diapers; I will do a post in the future all about them.
 |
| crumbsinmypurse.blogspot.com |
Below that is a drawer full of blankets. I also keep her crib sheets and spare change pad covers at the back.
Stay tuned for more posts on organizing all of that baby gear! Up next - the diaper bag!
Tuesday, January 29, 2013
Tried It Tuesday - Restore Wood Furniture

The other day I was sitting in the living room looking at our piano. It was badly in need of a good dusting, but I was feeling too lazy to get up and do something about it. Instead I was scrolling through my Pinterest boards with my feet up. I remembered that I had pinned a homemade furniture polish a while back, so I found it and my curiousity got the best of me; pretty soon I had the camera out and was taking photos of all the water stains and scratches on the old piano, and mixing up my oil and vinegar in a bowl with a rag.

I dipped a rag into the mixture and buffed the piano in circular motions, working from top to bottom. The husband came into the room when I was about halfway done and I excitedly made him come and watch. "Look at this! See this mark? Now watch . . . it's gone! Cool, huh?"

See that big spot? It looks like water damage - the finish is completely gone. You can also see a lot of small chips, scratches and scuffs all over the surface.

Same spot after the oil/vinegar mixture had been applied. The water damage has completely disappeared! I can still feel a different texture to the wood when I run my hand along it, but that is the only way I can find where the damage once was. It has completely blended in to the rest of the wood!
Within about 30 seconds I was back to relaxing on the couch and the husband was on his knees, buffing away at the lower portion of the piano. He said it was so my pregnant self didn't have to crawl around on the floor, but I think he was having just as much fun as I was with it!

The piano had a greasy shine to it for about 24 hours. We could see it being absorbed into the wood in dry areas, and for a few days afterward it had a blotchy appearance when the sun hit it - spots that were still shiny with oil and dry spots that had sucked it right up. I gave it a quick wipe down with regular furniture polish and it seemed to even things out and restore an overall shine.
Even after the oil has been absorbed, the piano still looks amazing! All of the scratches, scuffs, chips in the finish and even some splinters that had broken off from the bottom due to some rough moves over the years - all virtually disappeared! Obviously it hasn't filled in places where pieces of wood are missing or chipped, but the piano is a uniform color all over and looks almost like new! The wood looks glossy and healthy; it was in such rough shape that I was considering completely refinishing it or even *gasp* painting it, but now it looks so beautiful that I cannot imagine ever changing it!

The only place that I didn't have complete success was that big water ring on the top. It has faded dramatically, but is still quite visible.

It's quite dramatic damage though, and I didn't expect that this particular spot would completely disappear. I think I will do another round or two of the oil/vinegar on the area over the coming weeks and see if I can get a little more improvement.
Subscribe to:
Posts (Atom)
