Showing posts with label DIY. Show all posts
Tuesday, April 16, 2013
Chalkboard Paint Tips
Chalkboards are a big thing in the DIY world lately, largely due to Pinterest and the fact that most paint brands now carry cans of chalkboard paint; some brands like Benjamin Moore are even tinting them every colour in their paint line!
I've made a lot of chalkboards, and a few friends have asked me why their homemade chalkboards didn't turn out like mine, or why the writing doesn't seem to erase fully. They blame it on being a homemade chalkboard but really it's just that they didn't know a few tips and tricks of working with chalkboard paint. If done correctly, a homemade chalkboard looks and works just as well as one from a store!
Here are my top tips for DIY'ing with chalkboard paint.
1. Stir carefully.
Chalkboard paint can "break" just like a delicate sauce you cook on the stovetop. There is no need for vigirous shaking or stirring, just gently stir with a paint stir stick until it looks smooth.
2. Prep your surface.
If your surface is not smooth, your chalkboard won't be either. If you are painting a chalkboard wall I recommend you give it a light sanding and wipe with a damp cloth before painting. If you are wanting to create a chalkboard, choose a surface that is perfectly smooth. I like to use thin sheets of hardboard that are finished on one side, but I have also painted on glass (perfect for making chalkboard frames because you can just paint the glass insert in a photo frame).
3. Just like regular paint, it's better to do several thin coats than one thick, gloppy coat.
I find using a dense foam roller is the best way to avoid visible lines and get the smoothest finish. Chalkboard paint is thicker than most paint, so it's very easy to over apply it. I like to do 3-4 very thin coats for a nice smooth finish, making long straight strokes with the foam roller rather than just rolling it on all willy nilly or in the "W" shape that is recommended when using regular paint.
3. Resist the urge to try it out right away.
Give your new chalkboard at least 2 days to fully cure before whipping out the chalk
4. Season your surface
The first thing you should do when your chalkboard is ready to use, is to rub a piece of chalk all over the surface. Wipe it off with a dry cloth, and you are left with a slightly dirty looking chalkboard. NOW it's ready to decorate! If you draw or write on a freshly painted chalkboard surface without seasoning it first, you will always see what you first created no matter how many times you erase it. Chalkboard paint is dimpled and textured like the pores on your face. Filling them all in evenly with chalk dust ensures that your surface will always look even and future creations will wipe off easily.
Tuesday, April 9, 2013
Tried It Tuesday - Polishing Brass
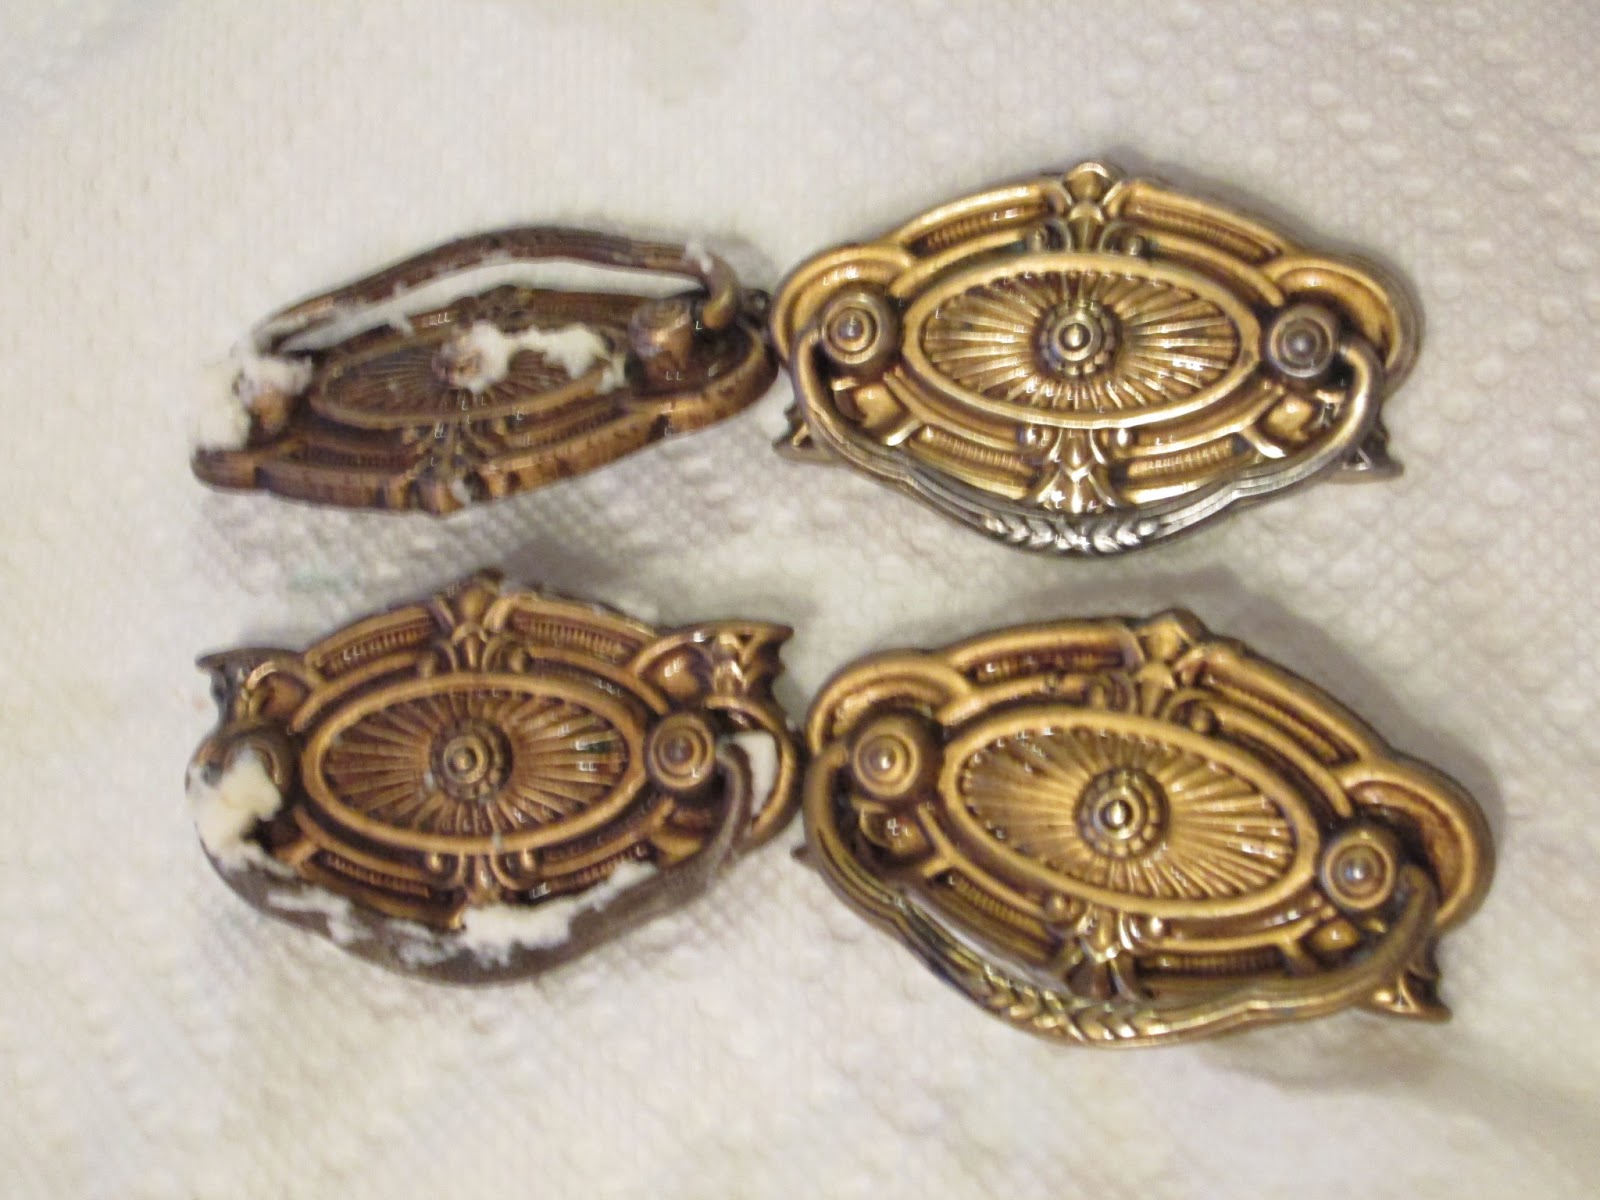
A few months ago I picked up an old dresser, complete with brass plated hardware that I knew would be beautiful, once it got shined up a little.
I know I could have bought some brass polish and be done with it, but the DIY'er in me wanted to see if I could polish it up with something I already had on hand, rather than buying a big container of Brasso that I would have no further use for.
| crumbsinmypurse.blogspot.com |
So, Pinterest to the rescue.
After removing the hardware, I tried soaking it in lemon juice and then scrubbing with a soft cloth.
| crumbsinmypurse.blogspot.com |
No change. Or if there was, it wasn't noticable to me.
| crumbsinmypurse.blogspot.com |
Next up - a paste made from vinegar, salt, and flour.
| crumbsinmypurse.blogspot.com |
I mixed it all up together according to the directions, and slathered it all over the hardware.
| crumbsinmypurse.blogspot.com |
30 minutes later, I washed them off and they didn't look any different.
| crumbsinmypurse.blogspot.com |
| crumbsinmypurse.blogspot.com |
Now I was getting frustrated.
I decided to wing it and pulled out some S.O.S. pads I had kicking around under the sink. I was nervous it might scratch the finish, but honestly it was already scratched and even worn completely off in some places ( which is fine with me ) so I figured I had nothing to lose.
It worked! A quick scrub with the S.O.S. pad and a rinse under some warm water and they were shiny once more! They still have a worn look to them, as they are only brass plated and the finish has worn off in spots and is still dark in all of the grooves - perfect for a shabby chic lover like me!
| crumbsinmypurse.blogspot.com |
Thursday, March 21, 2013
An Ombre' Dresser
Remember when I gave myself a deadline to finish 3 projects that had been lingering in the garage for way too long?
Well, I'm happy to report that I finished one! The dresser is finally out of the garage and in Brook's room where it belongs.
Last week I dug out my paint swatches, spread them out across Brook's bed and chose one that matched perfectly to the pink in her bedspread. A quick trip to the paint store while the Mister gave the dresser a light sanding and a coat of primer, and we were in business!
| crumbsinmypurse.blogspot.com |
I painted the bottom drawer first, and then poured some paint into a paint tray and added a splash of white. A quick stir and I painted the next drawer. Another splash of white paint, stir, and repeat.
| crumbsinmypurse.blogspot.com |
It's not perfect, but I am pretty pleased with how it turned out! It was a good way to step outside of my comfort zone, which is white, white, and more white.
| crumbsinmypurse.blogspot.com |
| crumbsinmypurse.blogspot.com |
Labels:
Brook's Room,
Decorating,
DIY,
Furniture,
Paint,
Projects
Friday, February 1, 2013
Kitchens Past - Our First Home
It's hard to tell from the photo, but the cabinets were oddly sized, homemade ones with rusting hardware. When you opened a door, the scent of curry punched you in the nostrils. The walls were painted alternating ; lime green with yellow trim, and yellow walls with lime green trim. There were white lace curtains hung from a brass rod, and brass light fixtures filled with bugs. The countertops were chipped formica, and the tap was almost stuck shut with calcium deposits. The floor was covered with burns and black marks, and the stove was harvest gold and burnt everything we tried to cook.
When we first moved in, we painted the cabinets white, got new hardware, and painted the walls blue. We covered the countertops with some cheap black plastic "refresh your countertop" gimmicky stuff. The backsplash was covered in metal flashing to make it look like stainless steel, and we bought a floor model dented stove from Home Depot with leftover wedding money.
We put the house up for sale shortly after finishing the kitchen renovations - and it sold in 2 days, for double what we had paid for it 3 years earlier! We walked away from that home feeling very proud of what we had accomplished, and itching to do it all over again.
Subscribe to:
Posts (Atom)